-
Before You Start: The Print-or-Outsource Test
-
Step 1: Calibrate the K1C Before You Trust It
-
Step 2: Print With Filament You Can Trust
-
Step 3: Set Up a Raspberry Pi for Remote Monitoring
-
Step 4: Design for the K1C's Real Tolerances
-
Step 5: When to Move to Fictiv
-
Step 6: Send Files Like a Professional
-
Step 7: Keep a Mistake Log
-
What Still Catches Me Off Guard
Here's who this is for: you've got a Creality K1C sitting on your workbench, you've printed the pre-sliced Benchy, maybe a filament organizer. And now you're holding a new product idea, wondering: "Can I just print this prototype myself?"
Short answer: yes. But only if you approach it as a process. Not as a hobby.
I'm a senior product engineer handling prototyping orders for 5 years. I've personally made (and documented) 14 significant mistakes, totaling roughly $3,200 in wasted budget. Now I maintain our team's checklist to prevent others from repeating my errors. This is that checklist.
Before You Start: The Print-or-Outsource Test
In my first year (2020), I submitted a prototype with the wrong tolerance callout. Looked fine on my screen. The result came back with holes misaligned by 0.8mm—40 components, $940, straight to the trash.
The issue wasn't the printer. It was the absence of a decision framework. So before you print anything, ask yourself: does this part need documented material properties? Print it. Does it need to survive a client demo? Consider Fictiv. Is it only for internal form-and-fit checking? Definitely print it. Will the customer expect a specific finish? This is where desktop FDM fails.
The K1C is one of the best 3D printers under 600 euros in 2025—but the best €600 printer still isn't a substitute for production manufacturing. It's a tool for eliminating unknowns cheaply and fast. The moment you need real material specs or surface quality, you should stop printing and get a quote from Fictiv's manufacturing platform.
Step 1: Calibrate the K1C Before You Trust It
"Best 3D printer under 600 euros" should be read as "best starting point." It's not plug-and-play. My first week with the K1C was a parade of failures: layer shifting, stringing, and a 9-hour print that turned into a bird's nest at hour 6.
Set aside 4 hours and $30 worth of filament for calibration. Run input shaping calibration from the K1C's touchscreen—it takes 20 minutes; do it anyway. Print a temperature tower for every filament brand you buy. Don't assume "PLA is PLA" (I did. It isn't.) Check extruder tension during the first test prints, because if filament slips, failures become nondeterministic. And watch the first layer. Physically watch it. Not a camera—your eyes. The first layer decides everything.
Per FTC advertising guidelines, performance claims need substantiation. Manufacturer specs reflect controlled test conditions, not your workbench. In the real world, you'll see 80% of the claimed speed and 100% of the frustration if you skip calibration.
Step 2: Print With Filament You Can Trust
It's tempting to buy the $12 spool of no-name PLA. I did it once. The prints looked okay until they didn't. Layer adhesion was poor, and dimensions drifted as moisture got absorbed over a week on the shelf.
The surprise wasn't the poor quality—it was how that filament behaved differently mid-print. The temperature settings from my good filament no longer applied. I chased settings for 3 days before switching back.
Stick with brands that publish consistent specs. Polymaker, Prusament, eSUN: all under $25 a spool. Their consistency is worth the difference. The $12 spool went into the trash after one failed batch—so the TCO math was bad from the start.
And store filament properly. Moisture absorption is the silent print-killer. A dry box costs $20, or you can build a Raspberry Pi–powered one for $15 and an afternoon (more on the Pi below).
Step 3: Set Up a Raspberry Pi for Remote Monitoring
Here's the reality: prints take hours. A typical K1C housing print runs 8–14 hours. You will not be in the room the whole time. Most failures happen when no one is watching.
The classic "how to use Raspberry Pi for 3D printing" setup is OctoPrint on a Pi, connected by USB to the K1C, with a webcam in the Pi. It gives you a live video feed, filament detection, time-lapses, and the ability to cancel a failed print remotely.
Setup takes 30 minutes: flash OctoPi to an SD card, enter Wi-Fi credentials in the wpa-supplicant file, boot the Pi, plug it into the K1C, attach a webcam. Done.
This setup saved me roughly $300 in the last year alone. Canceled a failed print from my phone at 11pm. Not glamorous, but quietly very effective.
Step 4: Design for the K1C's Real Tolerances
Searching for "creality k1c 3d printer product info and reviews" gives you the marketing sheet: 0.1mm precision, 600mm/s max speed, and so on. What it doesn't tell you are realistic tolerances for non-Benchy parts.
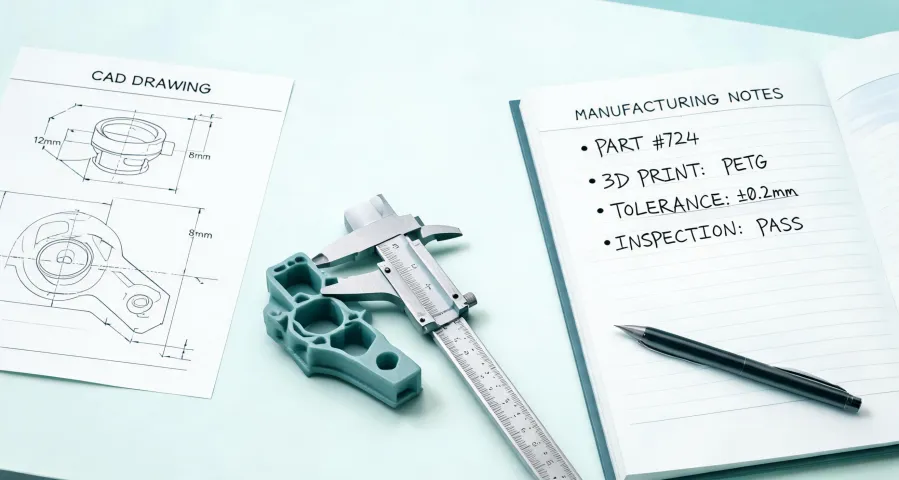
Here's what I design around after 2 years with the machine: wall thickness at least 1.2mm (3 perimeters with a 0.4mm nozzle), clearance between mating parts 0.2–0.4mm for press fit, 0.4–0.6mm for sliding fit, bridges under 10mm, and layer height at 0.2mm for functional parts—not the 0.12mm that sounds better on paper.
I once designed a housing with 0.1mm clearance thinking "the printer can do 0.1mm precision." The parts fused together. Every single iteration of five. The problem wasn't precision; it was material shrinkage and variance. FDM is not CNC.
Print a small coupon with your critical dimensions, measure it, then adjust your CAD clearance. Boring, practical, and it saves hours.
Step 5: When to Move to Fictiv
There's a moment in every project when desktop printing stops being worth it. My rule: the moment the prototype needs to represent production intent—material, finish, tolerances—hand it over.
Fictiv's manufacturing platform gives instant quotes for CNC machining, injection molding, and industrial 3D printing. Upload the CAD file, set material and finish specs, and you get price and lead time in minutes.
Why does this matter? Because TCO—total cost of ownership—is the only sane way to compare a $12 filament print against a $42 CNC part.
A real example: I printed a gearbox housing on the K1C. 16 hours, $6 in filament, $35 of my time including failed attempts and finishing. The part passed functional tests but the surface finish was unacceptable for a client demo. Fictiv's quote for the same part in CNC-machined aluminum: $38, delivered in 4 days. Total for the DIY route: $41 and 4 days, plus embarrassment. Total for Fictiv: $38 and 4 days, plus a part I was proud to show.
Was the DIY route wrong? No—it was actually the right call for earlier functional iterations. But $41 was not "almost free" the way beginners think of desktop printing. Write the numbers down. The lowest printing cost is rarely the lowest total cost.
Step 6: Send Files Like a Professional
Before you upload anything to Fictiv's platform, run this hand-off checklist. It's caught 47 potential errors in the past 18 months—that's 47 problems that never hit our budget:
- Lock the revision. Only send complete, reviewed files. I once submitted version 3 instead of version 5—catching it at the quote stage saved days (and credibility).
- Export as STEP. Not STL. STEP carries exact geometry without triangulation errors.
- Specify material, finish, and tolerance explicitly. Write "6061-T6 aluminum, as-machined, Ra 1.6 μm"—not "good quality." Vagueness costs time and money.
- Flag critical dimensions. A simplified 2D drawing for key tolerances prevents misinterpretation.
- Verify units. A millimeter/inch mix-up is almost a rite of passage. Mine was a 25.4x error on a mounting bracket, and the quote doubled when I corrected it.
- Check lead time before price. The value of a guaranteed turnaround isn't the speed—it's the certainty. Know your deadline first; then compare quotes.
Step 7: Keep a Mistake Log
The final step isn't glamorous, but it compounds. After the third rejected prototype in Q1 2024, I created a spreadsheet: date, part, what went wrong, cost, root cause, fix. Every failure adds a row. Every couple of months I review it and update the team's checklist.
A few entries: "verify unit of measure" came from the 25.4x error. "First-layer check required" came from the overnight failure. "Confirm shipping method before approving" came after paying $28 for overnight shipping on a $9 connector piece.
That last one is exactly what TCO thinking catches. Shipping is part of the total cost. USPS large envelopes (up to 12" × 15" × 0.75") cost $1.50 for the first ounce at standard rates—and most machined parts under a pound fit. It's not "free shipping or not"; it's "do I know what shipping should cost?"
What Still Catches Me Off Guard
Three things I keep reminding myself:
1. I underestimate finishing and rework time. Desktop printing is not set-and-forget; it's monitor-and-adjust.
2. One good print is not evidence. A single good print is a coincidence. Three identical successful prints is a signal.
3. I let "cheap" decide the process. Printing a part at home is worth it only if your labor is worth less than the vendor cost. And no, your weekend time isn't free. If you spend 3 hours tweaking a print, you're spending real money—whether you invoice it or not.
There's something satisfying about taking a part from a K1C print to a production-ready quote on Fictiv with zero rework. After all the failed prints and wasted budget, that payoff makes the process worth it.
Start with the 7 steps above. Close the gap between what your printer can theoretically do and what it reliably does. That's the whole game.
